
Welcome back to The Sims Resource! Today marks the beginning of a very exciting new blog series: TSR’s Book of Building! This series will take you step by step through every part of building a Sims home from blank lot to beautiful house. Ready to get started on exteriors? Let’s go!
1. What does your house need?

Whenever I start building from scratch, I always ask myself what the family I’m building for might need. How many bedrooms should there be? Am I trying to save money or space? What will make my gameplay the most fun? Having 8 sims in a household with one bathroom is more frustrating than fun, believe me. Figuring out the basic needs you have for the house saves you lots of time later on–and if your needs change, you can always expand! I’m building a home for two sims, a mother and daughter, so I know I need two bedrooms and a bathroom along with a living area and kitchen. Now let’s start building!
2. Start with a room
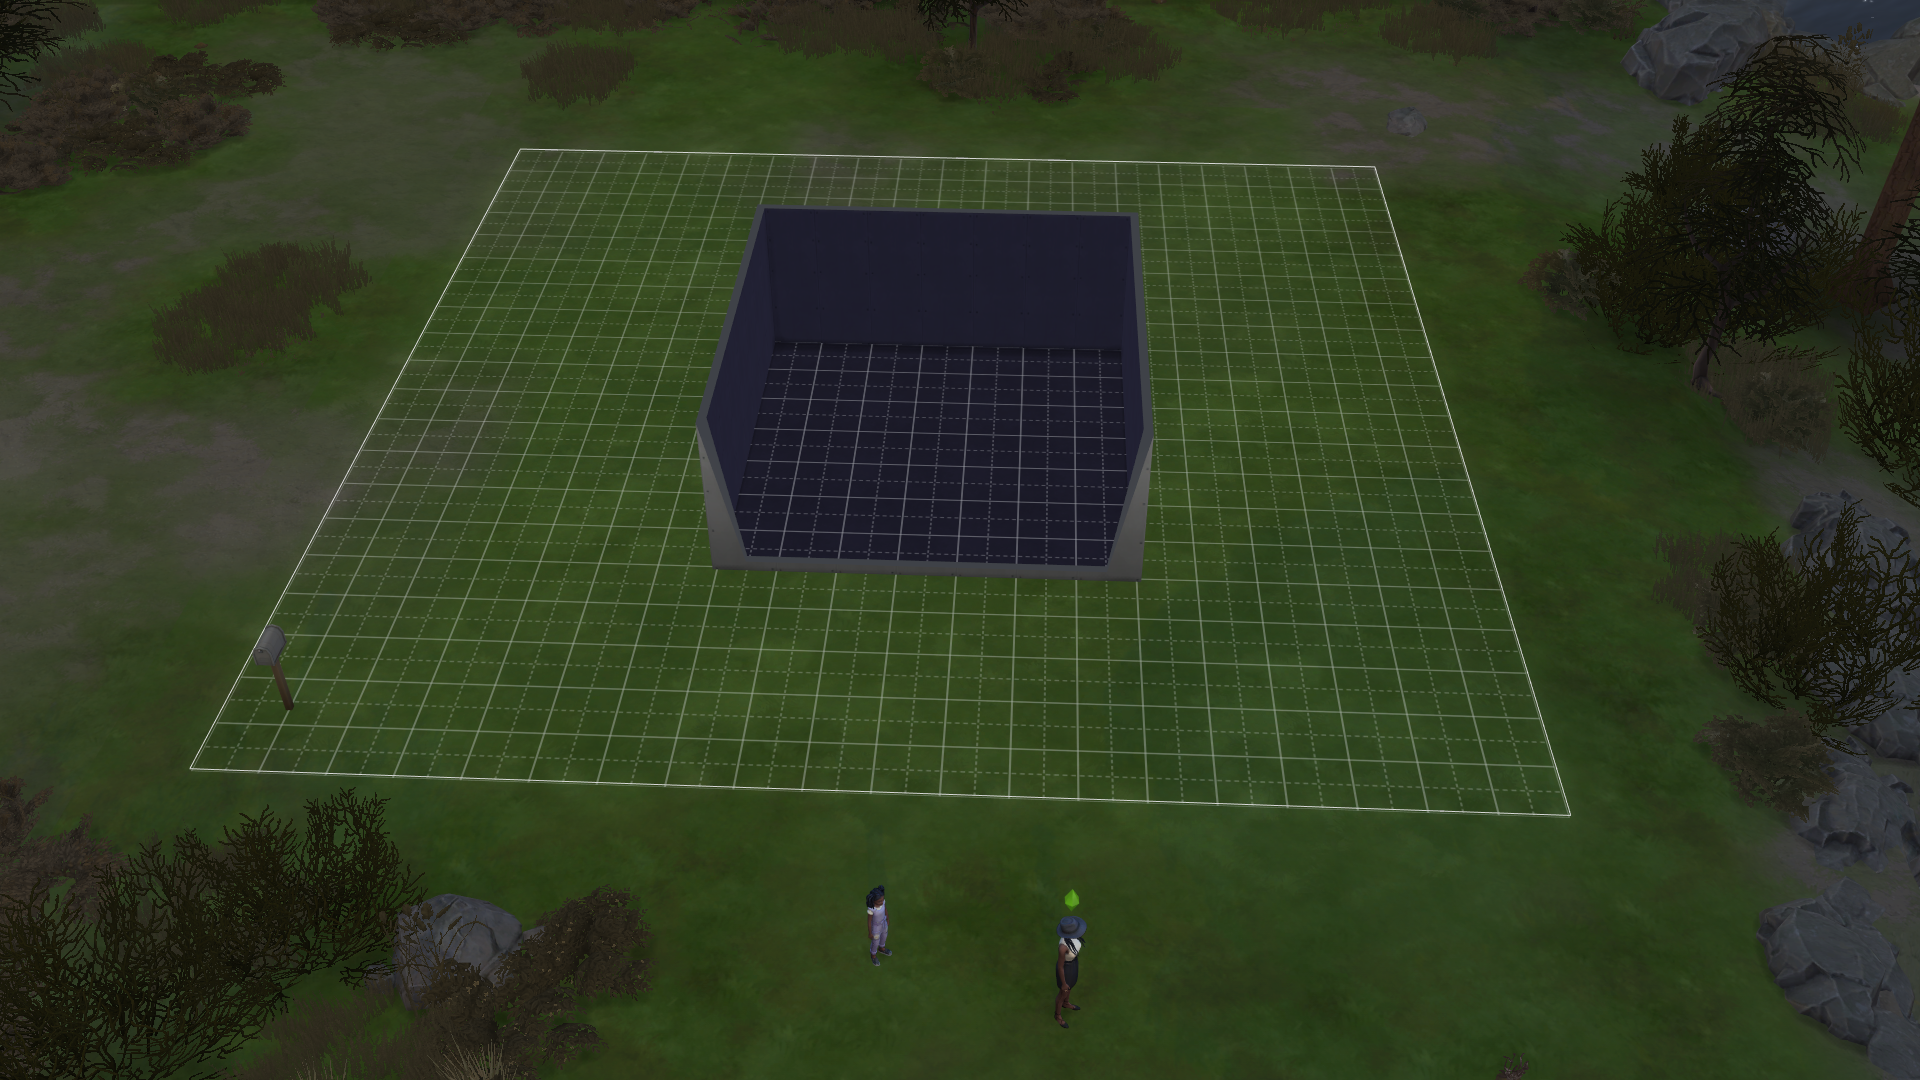
The first step of building a house for me is starting with one room. Don’t make the room too big, because you’ll be adding onto it later, but don’t make it too small either–this is the base of the entire house, so you’ll want some space. In general, I find that I make the starter rooms based on the size of the lot; a big lot can fit a big house, after all, while smaller lots fit smaller houses. Sizing this room is also important for landscaping–whether you want a fenced in yard, some trees, or a pool, you want to make sure you leave enough space for what you’d like to do. Once you have your room, you can move on to making it cool!
3. Add to the room

Most houses aren’t shaped like perfect squares, so to make your house more realistic (and bigger), adding on to it is the next step. I like to add some angled walls to make the shape of the house more interesting to look at, as well as some standard square additions that can be turned into more rooms. Add as much or as little as you want–the house is for your sims after all! Base your additions off the size of your original room so that nothing looks too out of place. Once you’re done with all your additions, you can move on to the next step.
4. Satisfied? Add a front and back door and a foundation.

After removing all the extra walls from my additions, it’s time to add a front and back door. Some builders prefer to wait for this, but having a clear entrance and exit point for my Sims really helps me to visualize what the final build will look like. I also like to add a foundation during this step. Not every lot needs a foundation, but I find that most house builds look better with them since most real life houses have foundations. Choose whatever door and window and foundation height suits your house, and then we can move on to floor plans.
5. Put down a floor plan

Floor plans are a mystery for a lot of simmers, so I’ll do my best to break down my process. I start off by dividing the bedrooms (left side of the house) from the main living area, in the front right. Bedrooms are typically easy to define because they only require a few objects, usually a bed and a dresser. I like a large, open living area, so I cut the main space off from part of the back to create a kitchen. I then took the back right corner of the living space and made it into a bathroom. If you’re having trouble dividing your own space, place basic furniture objects like beds, couches, and counters in the space and see how they fit and then adjust as needed.
6. Add a roof

Next up is another tricky step–roofing. I promise it gets more fun from here! Roofing isn’t as scary as it seems once you learn the method. Start by roofing the largest section of the house first. For me that’s the living area, so I placed a hipped roof on that section. For the rest of the house, I used smaller, half-hipped sections to cover the remaining rooms, making sure to connect them to the largest roof section that I placed earlier. I like to use the corner tool to pull out the roof pieces so they hang out a bit over the edge of the house. Once you’re done roofing, we’re back to the fun stuff.
7. Add interior doors

Deciding where you want your interior doors can be a little tricky. I usually end up trying a few spots for each door before placing them, but keep in mind that they can always be moved if they pose a problem while furnishing. One of the most underused types of doors is the archway–it keeps small floor plans feeling bigger than they actually are by making them feel more connected to each other, so I use them in a lot of builds. Satisfied with your doors? Let’s move on to windows.
8. Add windows

Windows are one of my favorite parts of a build, since they really make the house start feeling like a place where your Sims will live instead of a collection of boxes. I try to make my windows match the doors that I pick, but you can do whatever you think looks good. Most rooms should ideally have at least one window to let some natural light in, but sometimes smaller rooms like bathrooms end up without them because of their limited wall space (also, who wants to be looked at in the bathroom?). Once windows are all placed, your exterior is practically done!
9. Ready to furnish!

Thanks for reading the very first edition of TSR’s Book of Building: Exteriors! Come back next time to learn all about interior decorating. Interested in more build content? Check out Room Reno: Teacher’s Office or our lot tours of starter homes. Looking for something else? Read our All Stars 6 or The Good Place inspired lookbooks!