
I was asked to make a tutorial to show you how I made my costume makeup stuff with the Workshop for The Sims 3. I thinks it’s easy to do, and it takes maybe not a lot of time for you to do, but, take a look yourself. 😉
First Step
Open the TSR Workshop and open a new Project. Choose Makeup/Facial Overlay and the Age, Gender and Clothing part you want to create. I chose Young adult x Male x Everyday.
Choose the mask called: amCostumeMakeUpFeline (the tiger mask) and go on with “next, next and ok.” The mesh will load.

Second Step
Now, you have your Feline Mesh on the left and some tabs on the right. the first tab is for your Filename and description, the gender you want to make your stuff for and the age. You can name your mask and put in a short description, I use always the same name for all. You can also change the type of your mask (Glasses, Makeup… ).
First you have to edit the name and description. You could do it later, but I think it’s better to make this first, so you can’t forget it later. Type in title and description. I named it all “Facial Tattoo.”
Then choose the gender and age you want to make it for. I chose child to elder for both genders. Now click on “extras” and fill in a filename (should be the same as you filled in before – for example, Facial Tattoo) and for filename 2, you can fill in your credits, e.g. Billabong/your name.

Third Step
Okay, now go to the “textures” tab and click on: Face Overlay. If it’s marked blue, you will see a little button with three dots on the right site. Click on it to pop up another window. Now you’ll see another window with a white colored Image of the mask on a black background. Choose “export” and save the Image under a name you find easily somewhere you want. I chose the name “Tattoo_Overlay” and saved it on my desktop. Click done to close the popup window.

Fourth Step
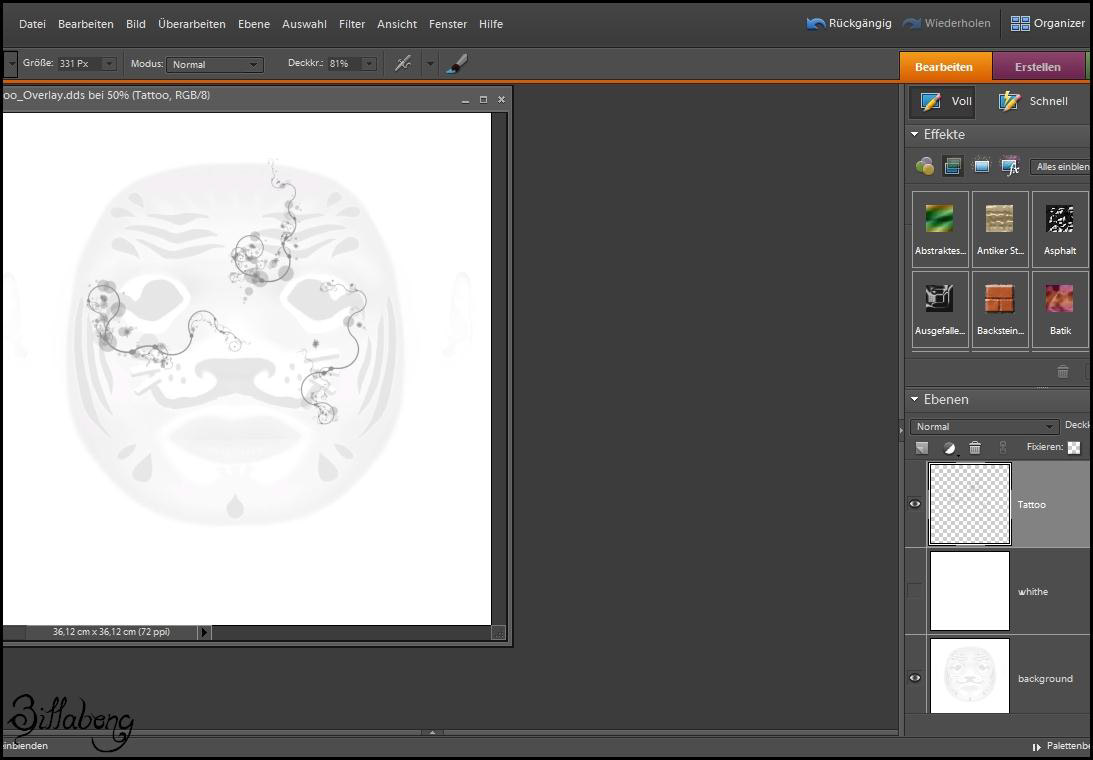
Open an Image program that can open DDS files! Maybe you have to download a plugin for this. I use Photoshop Elements 6.0 with a plugin. Open your exported Overlay Image with it without loading midmaps! Now add two new layers. Color one of them in white and make it invisible! The second one you made you can use fordoing your mask on. The reason that the white layer is hidden is that it’s better to do the mask when you see the original image. So you have a lead on where the eyes and the mouth go and where to place the mask. In my case it looks this way:
Fifth Step
Now, delete the original layer with the tigers mask and make the white layer visible. You should see your mask on a white background. If you´re ready, save the Image as .DDS file and change to the workshop. Click again to mark the Face Overlay section and click to the button with the three dots the same way you did one step before. This time Click “Import” and choose your .DDS mask image! Click done.
Please don’t be afraid that the colors of the feline mask are already selected. We will change this next!

Last Step
We´re nearly finished. Now we have to hide the feline colors. Under the “textures” tab you will see some more categories called: tint color A, B, and so on. To hide this you only have to click on the “true” section and choose “false”. Do this from A to C or D, if it is enabled too. Your Face will go clear and your mask will be the only thing leaving.
Now, save Your Creation as Sims3Pack. Go to File, choose Export and To Sims3Pack.
To make more than one mask in the same category, click on the “copy” symbol on the right top 😉
You are finished!
