
For this Sims 3 pattern tutorial, it is assumed that you already have some basic knowledge about how to work with the Gimp. It will teach you how to use channels and working with the DDS format.
Needed for this tutorial:
- The Gimp (freeware) – http://www.gimp.org/. You’ll need version 2.6 or higher.
- DDS-plug-in for Gimp – http://nifelheim.dyndns.org/~cocidius/dds/ (use the win32 binaries link under downloads, and place the extracted dds.exe file in the Gimp plug-in folder, usually located at C:\Program Files\GIMP-2.0\lib\gimp\2.0\plug-ins).
Patterns in Sims 3
Patterns in The Sims 3 make use of the 4 channels red, green, blue, and alpha. The channels themselves are grayscales, and work as a mask. A pattern can use 1, 2, 3, or 4 channels.
There are basically two ways to create the channels: the direct method (working directly in each of the channels) and the indirect method (working on a base image and use the RGB channels of that image as the channels for your pattern.
Patterns with only one color (light and dark versions of one color) can be made very well with the (easier) indirect method. Four-color channel patterns must be made with the direct method. Patterns with 2 or 3 channels can be made with both, but it depends on the type of pattern which method will give the best result.
In this tutorial we will start with the more simple indirect method, and move on to working in the channels themselves later on.
Creating Channels – Indirect method – One color
First will be explained how to use the indirect method for patterns with 1 color.
- Open Gimp and create a new 256×256 image.
- Create your pattern. Since it’s a 1 color pattern, it will need to have lighter and darker shades of grey. Make sure the pattern is seamless. As an example is here a built-in pattern of Gimp used.

Everything in the pattern that is white, will fully take the color that is used for the pattern. The more darker grey it is, the less it will take the color that you choose for the pattern.
- Choose a pure red as foreground color (255,0,0).
- Select Bucket Fill – Mode: Multiply.
- Fill your pattern with pure red.

- Save your file as DDS: Compression None – Format RGBA8 – Generate mipmaps.

- You can now start Sims3Workshop, import your DDS file there, and choose the color that you want to use for this pattern.
Creating Channels – Indirect method – Two or Three colors
When using 2 or 3 channels, you’ll need to work with layers. Make sure you have the window for layers open in Gimp (Windows > Dockable Dialogs > Layers).
- Add 1 or 2 layers, depending on the number of colors you want to use for your pattern.
- Create each part of the pattern on a different layer.
Here you see the base of a pattern that will have 3 color options.

- Color the layers red, green and blue (when using 2 channels use red and green). Always use red for the background and green and blue for the layers above that.

- Merge the layers down to make it a one layer image (Layer > Merge down)
- Save your file as DDS: Compression None – Format RGBA8 – Generate mipmaps.
Working directly in the channels
As long as you’re using solid colors in you pattern, a 2 or 3 channel pattern can be made with the indirect layer method without too much problems. But when your pattern has parts that are not solid, the red, green and blue channel can get mixed up, resulting in parts of the pattern that will take for instance a bit of both the colors in the green and blue channel. In that case it’s best to work directly in the channels. In the Gimp you will need to decompose the color channels into layers to be able to do that.
- Create a new 256×256 image.
- If you want to use 4 channels, you’ll need to add an alpha channel. To do that, choose Layer > Transparency > Add Alpha Channel. If you want to use less than 4 channels, you can skip this.

- Decompose the color channels into layers. (Colors > Components > Decompose).

- Choose RGB if your pattern will have less than 4 channels, and RGBA if you want to use 4.
- Check the “Decompose to layers” box.

You now get a new image with 3 or 4 layers, called red, blue, green, and alpha. You can only work in grayscale in these layers.
Create the different parts of your pattern in each of the layers, and keep in mind that white parts will fully take the color, black will be fully transparent (it will let the channel below it show it’s color and for the lowest channel (red) it will show the background), and grey will partly show the color. Don’t use transparent parts when working in the decomposed channels, only black, white and grey.

Since you can’t work with transparency in the decomposed channels, it is easier to create the base of your pattern in a different image, with each part in a different layer, and copy those parts into the decomposed channels. That way you can use transparency while designing your pattern. Make the decomposed channels completely black before you copy your pattern on it, and invert the black/white of your pattern if needed (Colors > Invert). Here is an example of a 4 channel pattern, with the original design in a different image, and each part of it copied into the decomposed channels.
When you’re ready with creating each part of your pattern, you’ll need to compose the channels again, to make the decomposed channels work again as red, blue, green and alpha channels.
- In the menu choose Colors > Components > Compose.

- Choose Color model RGB if it has 3 channels, and RGBA with 4 channels. Don’t change the other settings.

At this point the result you get can look very strange, especially when you have used the alpha channel. The color channels will also not look like you just made them when they were decomposed. Don’t worry, the end result will be ok.
This is for instance how the composed image of the earlier example and it’s red, green, blue and alpha channels looks like.

- Save the compose image as DDS file (you need to have the DDS-plugin for this).
- Use Format RGBA8.
- Select “Generate mipmaps.”

You can now import the DDS file in The Sims 3 Workshop.
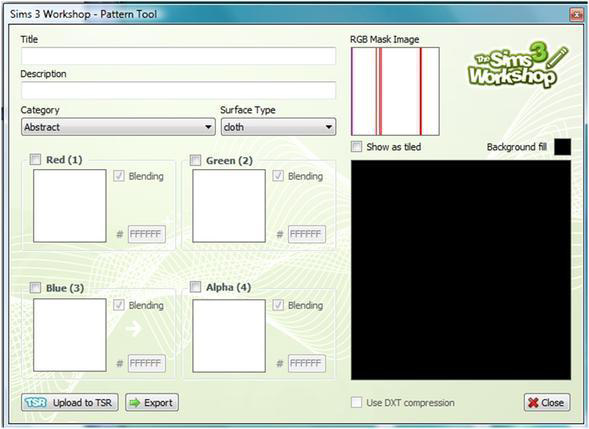
The RGB mask Image can first look strange in The Sims 3 Workshop, but as soon as you have assigned colors to each of the channels, it will look like the pattern you designed.

Additional Gimp tips
For making seamless patterns, it’s often helpful to turn the grid on, and make the grid fitting the 256×256 size.
- Choose Edit > Preferences > Default Grid.
- Change Spacing Width and Height to 8 pixels. (The grid will only change for new images! Existing images will keep the grid they had).
- Choose View > Show Grid and/or View > Snap to Grid.
Test the seamlessness of your image by Tiling it.
- Filters > Map > Tile ( 1024 is a good size to test for seamlessness).
You can change the layer and channel preview-size , to give you a better view on how they look.
- Click on the little triangle in the upper right corner of the layer/channel window.
- Choose Preview Size > Enormous.
When you want to turn a colored image to a grayscale, you can tweak the way it is done.
- Colors > Desaturate. You can choose between Lightness, Luminosity or Average. The best result will for patterns often be the one that gives you the most contrast.
- If the grayscale doesn’t give enough contrast, you can tweak it further by using Colors > Brightness-Contrast.
- If that’s still not giving the wanted result, you can also use Colors > Curves. Grab the curve and move it to get the result you want to have.